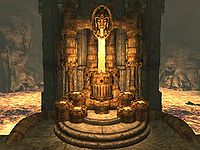
Skyrim:Lost to the Ages
Contents
|
|
Quick Walkthrough[edit]
- (Optional) Read The Aetherium Wars.
- Travel to Arkngthamz.
- (Optional) Retrieve the unique bow Zephyr.
- Locate and retrieve the four Aetherium Shards.
- Locate the Aetherium Forge inside the Ruins of Bthalft.
- Choose your reward: the Aetherial Crown, Aetherial Shield, or Aetherial Staff.
Detailed Walkthrough[edit]
The Aetherium Wars[edit]
In ancient times, the Dwemer constructed four city-states led by the great research center of Arkngthamz in the Reach. Their purpose remains unknown, but the city-states were undefeatable and held their ground against attacking Nords for centuries. Then, in the midst of the First Era, all four city-states suddenly collapsed within three years. The Nords ascribed the destruction of the cities to the strategic genius of High-King Gellir, but many scholars suggested that the cities fell for other reasons—although the mystery was buried along with the cities and merely forgotten.
The Aetherium Wars is a tome written in the present day by Taron Dreth which details the fall of the four cities and even offers an explanation for the downfall of the Dwarves: namely, Aetherium, an ultra-rare crystal-like matter with a strong, magical aura. The author suggests that the Dwarves found a considerable amount of Aetherium and started experimenting with forging it into weapons with a newly constructed "Aetherium Forge". Due to their brilliance, the Dwemer actually succeeded. The weapons created were so powerful that the strong bonds between the four city-states shattered, as everyone wanted to have access to the Forge, with subsequent conflicts weakening the cities enough for them to be an easy conquest for Gellir. The book ends with a challenge for the adventurer: "But nothing like the Aetherium Forge described in the inscriptions has ever been found within the borders of Skyrim. It may have been destroyed long ago, by the Nord invaders or the Dwemer themselves. Or perhaps it, like the secrets of Aetherium itself, still remains to be discovered."
The Ghost of Katria[edit]
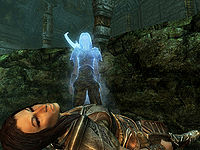
As soon as you open the book, an objective will be added to your journal, encouraging you to investigate Arkngthamz, a Dwemer ruin located down the path from Dushnikh Yal. As you approach the entrance, the earth will quiver underneath you, hinting at things to come. A few feet into the ruin, the whole place will shiver, and an unidentified female voice will echo through the halls, saying: "Please, turn back... before it's too late..." Follow the tunnel to a very large chamber and look around for a bit. Before long, a ghost will appear and actively seek you out, asking you if you are there for the treasure. When asked, the ghost will reveal herself as Katria: "The name's Katria. I am - was - an adventurer. Raided ruins like this for nigh on twenty years. I was on the trail of something big. It led me here, and... I didn't make it." When you point out the familiarity of her name, she will reveal herself to be the Katria to whom the book The Aetherium Wars is dedicated, although she will angrily add: "That was my theory, you know. My research. My life's work. All of it, lost! Stolen by my own damn apprentice! That's how I ended up here. I can't rest. Not until I find the Forge, until I can prove that it was my discovery. Mine, not his!" She will then tell you that she died in Arkngthamz and will warn you once again. You can then persuade her or choose to be friendly or hostile. All three opportunities will lead to Katria giving up and offering her help in guiding you through the ruin. As she obviously knows her way around, there is no real reason to reject her offer, so bring her along. This will finally initiate the quest and you have a long trek before you.
Climbing Arkngthamz[edit]
Take another look around and get familiar with the place. The clear blue sky is visible above, along with several ledges, while a waterfall feeds an underground lake below. When asked about the state of the place, Katria will tell you that a huge earthquake hit the ruin and destroyed everything, killing her in the process. She will also mention what's ahead of you: "Well, there's the Falmer, to start with. Deadly rapids. Major earthquakes. Massive chasms. Unstable ground. Lethal falls. And then you get to the real danger. We can discuss that when the time comes. If it comes."
Just above the water is a small ledge with a dead body. Use the fallen pipe to reach the ledge and you will find that it is Katria's body. Katria will sadly comment: "...this is where I ended up. It was... quite the fall." She will then ask you to grab her journal from her body. Pick up Katria's journal and search the underground area for a Dwemer chest. From the ledge, head west, past a dead Falmer. As you make your way through the tunnel, two Dwarven spider workers will jump out of the pipe in the ceiling and attack.
The next room is flooded, with an unlocked chest underwater in a corner, but another pipe makes a convenient, although narrow, bridge to the northwestern passageway. At the end of the tunnel is a door opening and closing and, behind it, a strange device. Once again, Katria will be helpful: "See that thing? Dwarves called them 'Kinetic Resonators'. Don't see them very often, least not among the clans in Skyrim. Just hit them, and they'll... do whatever it is they're supposed to do." Locate the second resonator and hit it with your weapon or a spell. The northern doors will swing open and reveal a staircase leading up.
Reaching the Summit[edit]
Before long, you will arrive in the central chamber, on one of the ledges above your starting point. Kill the Falmer enemies and keep an eye out for two chests. Proceed upstream along the waterfall using the tiny ledges and bridges and kill all the Falmer you meet. When you reach the top, the bridge will turn into a narrow passageway in the stony wall. Beware of the next chamber and watch your health, as you will be attacked by numerous Falmer, chaurus, and chaurus hunters.
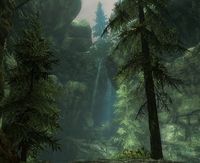
At one Falmer camp you can take a detour for a bit of extra loot by heading left through a gate to the southwestern passage that leads to the top of the waterfall and a chest to its left - beware of a Falmer that drops down and attacks you, though. But your target tunnel is the one to the northeast. It leads to a naturally lit cavern, with huge trees reaching toward the blue sky. However, a huge hole in the center, with your starting point a long way below, hints at the destruction caused by the earthquake. A sad Katria will confirm it: "Here's where I fell. Feels like ages ago." She will, however, cheer up when she spots one of her old belongings: "Hey, there's my bow! There, out on the log. Wondered what happened to it." The bow is the unique Zephyr, one of the fastest bows in the game, so carefully approach and claim it, while making sure not to take the same fall as Katria. Locate the northeastern slope and proceed forward until you reach the summit of the ruin, a very large chamber with a huge Dwemer construction to the north, seemingly the best preserved part of the city-state of Arkngthamz. A huge task is obviously ahead, and all Katria will say is: "Here we go."
The Tonal Lock[edit]
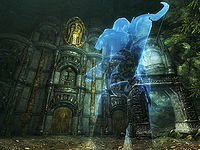
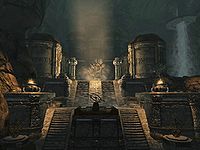
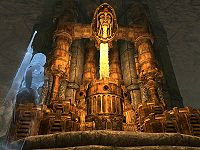
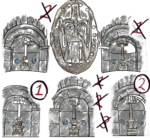
As you approach the huge construction, Katria will finally explain the real danger she spoke of earlier: "You know what this is? It's a lock. A 'Tonal Lock'. Simple, and very, very deadly. See the Resonators up there? Strike them in the right order, and the doors should open. Get it wrong, and... well. You've seen what happened when I tried it." She is obviously referring to the five Resonators, similar to the ones that you saw in an earlier chamber, and you must hit them in the correct order for the door to swing open. When asked for advice, Katria will say: "Hmm... well, you can pick up where I left off. My notes should still be in my journal, if you can read it. Beyond that... well, maybe one of our predecessors still has a clue." She refers to a deceased adventurer near one of the pillars, so examine his body for a scrap of paper containing a hint on how to solve part of the tonal lock. Additionally, Katria's journal will have another drawing, depicting what she managed to figure out before the earthquake hit the ruin. The order of the first three Resonators is clearly marked on the two maps, while you will have to guess the last two. The traps still work, as predicted by Katria. Each time you hit an incorrect Resonator, a new trap will trigger and cause mayhem, resetting all Resonators in the process. If you lack a ranged weapon or a spell, get the bow and some arrows from the deceased adventurer. When you choose the wrong Resonator, the various traps will trigger as follows:
- Unleashes four Dwarven spider workers.
- Unleashes two Dwarven spheres.
- Triggers the two Dwemer ballistae under the ceiling.
- Unleashes the Dwarven Centurion.
- From that point forward, the ballistae will reload and fire.
Place yourself in front of the construction and look at the two drawings.
| Katria's Journal | Scrap of Paper |
|---|---|
 |

|
The first three Resonators are easily discernible from the journal and the scrap of paper, but the last two are unknown. You can experiment yourself, or click here for the solution. Once you have hit the right combination, the two side doors will swing wide open and you will have access to the treasury of Arkngthamz without interference from the imprisoned Centurion. In the hidden room behind the Tonal Lock, you will find plenty of Dwemer scrap metal, a few Dwarven metal ingots, and the biggest treasure of all—the Aetherium Shard, located on a small podium. When picked up, an overwhelmed Katria will say: "Let me see it. ...Huh... What? What is this? Look, on the edge here. This has been cut, precisely cut. If you had another piece, about the same size, it would... it would snap right in. I saw a drawing of this once. This shard... it's... it's part of a key. A key made of pure Aetherium! The key to the Forge!" She will then explain what needs to be done: "We have to find the other pieces, of course. There should be, hmm... three more. One for each of the four cities that worked on the Forge. I had a map, in my journal. That's where we should start." She will, however, realize the size of the task at hand: "We still have to find the Forge itself. I had a lead on that, too. There's so much to do. I'm going to head out and start tracking things down. We'll meet again, I'm sure of it. For the first time in a long while, I think I - we - may actually be able to do this. And... and I owe it all to you. Thank you." She will then disappear and leave it to you to loot the chest behind the pedestal for a boss-leveled treasure and find your way back to the entrance. The easiest way is to locate the small tunnel in the water in front of the Tonal Lock, then make your way to a small ledge above the huge main chamber where you met Katria for the first time. You will need to make a running jump to clear some rocks and hit the water. If you are unable to do this then the Whirlwind Sprint or Become Ethereal shouts will help; if these are unavailable, then you will need to walk the long way back to the entrance.
Hunting the Shards[edit]
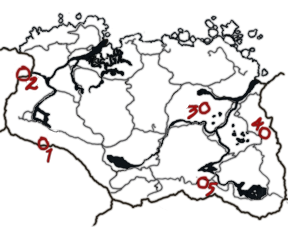
When you surface from Arkngthamz, up to three map markers will have been added to your map if you've already discovered those locations, if not, then it is up to you to find the shards, matching Katria's scribbling in her journal and the number of shards still in need of uncovering. You will have no choice but to travel to all three destinations, in no particular order. Katria will have numbered each spot on her own map in the journal, along with some quick thoughts, so it's worth reading through.
The Aetherium Site[edit]
Mentioned as a 'Bthar-zel' ('allied city'?). Not Bthardamz, though.
This is located just north of Bthardamz, specifically a landmark known as Deep Folk Crossing, a bridge over a waterfall with two watchtowers of Dwemer architecture. Head north up the hill from the bridge and you will find a large podium, with yet another Dwemer Convector, which is empty. Placed on the other side is the Aetherium Shard. When you pick it up, Katria will appear and thank you, then disappear once again.
The Aetherium Mine[edit]
The primary source of Aetherium. Extracted from some deeper mine?
The shard here is in the huge Dwemer ruin of Raldbthar, which is located between Lake Yorgrim and the White River, southwest of Windhelm and almost directly east of Shearpoint. Members of the Dark Brotherhood may have visited the ruin beforehand as part of the quest Mourning Never Comes (if not, see this section for potential bugs), as it is the hideout of infamous bandit leader Alain Dufont. The Aetherium Shard is located at the very end of the ruin in Raldbthar Deep Market, so get ready for a long trek.
NOTE: Even if you have already cleared the ruin, the elevator may be shut tight due to the exterior cell re-spawning after 10-30 in-game days. As a result, no easy access will be available to the final chamber of the ruin and you will have to go through it all again. Jump up to the elevator and see if it is accessible; otherwise, click the show button to the right for a full dungeon walk-through.
Dispose of the three bandits guarding the exterior area and enter through the main gate. Down the tunnel will be another bandit, ready to go to sleep on one of the bedrolls, so approach carefully and kill him. At the next intersection, the residing bandits have made good use of a constantly burning flame spout trap, cooking a charred skeever in the flame. You can either dodge the trap and proceed straight ahead or take the longer route to the east; the latter option will net you several more encounters with patrolling bandits but will also provide an opportunity to kill Alain Dufont and his companions with the lever-operated Dwemer ballistae on the ledge above their camp. In either case, open the gate southeast of the camp and search the next room for the Sneak skill book 2920, Last Seed, v8, right above a locked Dwemer chest. The southwestern corner has a master-locked gate blocking a bit of worthwhile treasure, while your target is behind the huge door to the southeast. Follow the corridor as it twists and turns, then open another set of doors into a huge chamber guarded by numerous Dwarven spiders and spheres. Use the oil on the floor to your advantage, then proceed southwest. Around the next corner, beware of the two sets of spinning blades and dodge them as you move up the slope. Next up is a huge chamber in two levels, with a flame spout trap and a sphere. Head up the stairs and fight another sphere, then follow the oil slick to yet another set of stairs. Take the tunnel leading northwest and fight two spiders before pulling the elevator handle that will take you to the next area, Raldbthar Deep Market.
In the Deep Market, the surroundings have changed considerably, hinting at the ruins' connection to the Dwemer city of Blackreach. Head down the dark slope and avoid the spinning blades by hugging the walls. Open the door to a large chamber in several levels, crawling with Falmer enemies, skeevers in cages, and dead humans. Make your way to the stairs leading up, then follow the slope to the huts. Up there, a bridge leads to a platform in the northeast; cross it and kill the Falmer. Activate the button on the table behind the tent and watch the bridge lower on the central platform. Backtrack and cross the now-lowered bridge to proceed into a small tunnel, only to re-emerge in the same chamber. Making sure not to fall off the edge, cross the rooftops until you find an opening in the grate. Find the narrow tunnel leading west, then south. You will meet a few Dwarven spiders here, along with a pressure plate triggering a deadly explosive bolt from the Dwemer ballista on the adjacent platform. Make your way through lots of steam and pipes and beware of another pressure plate triggering a claw trap. The steam also hides a spider and sphere. Head to the big northwestern door and open it. Up the slope are four buttons placed next to each other. Only two of them still work. The first on the left will trigger two flamethrower statues, while the third from the left will lower the portcullis blocking your way through the western tunnel. Open the door and face the final chamber of the Deep Market. Four Falmer enemies will be lurking around the many tents, while several chaurus can be heard rattling in a closed pen to the south. Make your way west toward the pond with the broken machinery. The noise indicates that the wheels are stuck, so remove bones, skulls and spines from the wheels so they can work properly again, including the scrap stuck in the wheel underwater. When everything runs properly, stand on the bridge and press the button to see the bridge lower. No escape yet, as the lowered bridge reveals a leveled Dwarven centurion. After fighting it off, loot the chest where the Centurion rested, then open the door. Follow the tunnel and pull the lever. Kill the three spiders and a sphere then head into the northeastern chamber to claim your Aetherium Shard. The elevator leading up can be found to the southwest, so hear what Katria has to say, then ride it up into the fresh air.
The Aetherium Storage[edit]
A storage site for raw Aetherium, just outside a major city.
A few feet south of the gigantic Dwemer ruin of Mzulft sits a smaller building named Dwarven Storeroom. Inside, you will see Katria standing in front of a locked door, who will ask for help prying it open. However, another door to the southwest has an apprentice-leveled lock and leads to a small room with several ingots and two minor loot chests. At the end is another door leading left, also with an apprentice-leveled lock. Pick it and enter the room Katria initially wanted to enter, and claim the Aetherium Shard on the podium. Katria will appear and thank you, then disappear again.
The Aetherium Crest[edit]
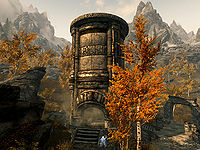
Once you have claimed all four shards, an excited Katria will tell you to meet her at the Forge, although it is unclear where the Forge actually is. Fortunately, she marked the location on your map (based on location 5 from her own map), so travel to the small Ruins of Bthalft southeast of Ivarstead to meet her again. As foretold by her journal, the altar here has an astrolabe on top and space for a round object in the middle. When you arrive, Katria will seek you out and say: "You made it! And you've brought the shards! She will then tell you to check out the device: Look at the device here - the gear in the center is just about the right size. Try putting the shards in and... we'll see what happens." Obey her orders and activate the Dwemer Mechanism, and watch while the shards turn into a perfectly round Aetherium Crest, although nothing else will happen. Katria will suggest moving the finished crest from the device; do so and then keep your distance from the mechanism, as the earth will begin to tremble heavily underneath you. Before long, a huge tower will shoot up from the ground, revealing an entrance with a handle in the middle. Katria will head on inside, fascinated with the uncovered secret, so follow her and push the handle to take the elevator a long way down.
What Lies Beneath[edit]
As the lift ends its incredible descent Katria will express some concern: "That took longer than usual... How deep are we?". Go through the open wall on your right to find an apprentice-locked chest with random levelled loot. Return to the lift and pull the handle next to the gate. The gate will open and the first brazier will light. The path is the only way to go here, and the braziers will light before you as you follow it across the river. Before crossing the river at the bottom of the first set of stairs, turn right to find a path that circles around to an apprentice level chest. Return to the main path. The braziers automatically activate casting light over a cave-like structure.
Before starting to cross the river using the land bridge, first descend the rest of the way to the water level on the dirt path. Continue into the water. Swim under and keeping left to find a soul gem underwater. Next to it is a skeleton and a dwarven sword. Also swim to the waterfall. Behind the waterfall is a locked chest. Return to the main path again.
Cross a land bridge to reach a small altar filled with Dwemer gear and scraps. Katria will tell you, "Just think ... No one's been here for four-thousand years." Head west over the next bridge to a huge stairway leading up between several smaller buildings. Before climbing the stairs, go east to follow a path at the cliffs' edge to find a leveled Dwarven Battleaxe with a random enchant. Return to climb the Great Stairs, ignoring the frozen Dwemer Spheres on either side. At the top of the stairs stands a tree, almost completely yellow, and is obviously dead and frozen in time. There are two blocked entrances, north and south. The south entrance has an expert-locked chest. The north entrance leads into the cliff and to the top of the waterway you crossed over twice by bridge before. Turn to the right and hug the northeastern part of the building which leads to two silver ore veins. Here is where you get to that chest mentioned earlier. Go back to the beginning of this path and swim across to the expert-level chest. Before you swim back across to continue the quest, dive to the east. Right before the water cascades down, you can find a small filled soul gem on the ground. Now return to the main path. When you approach the western gate, Katria will say: "Door's shut tight. I bet those Resonators would open it, though.", pointing your attention to the two resonators high above. Hit the two Resonators with a ranged weapon or spell and the gate will open. As you descend the stairs Katria will comment: "The air here... it feels different. Almost like..." At the bottom of the stairs the hall turns to the South and ends at a door. On your left, just before the door, are two Health potions, a Potion of Magicka and an Elixir of Resist Fire. There will also be a random Dwarven Helmet. It's a good idea to retrieve all the potions before opening the door. You'll need them.
The Forgemaster[edit]
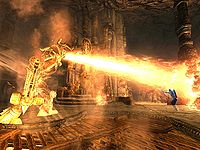
Behind the next door sits a huge construction, although most of the room is covered in steam billowing up from the floor. You will lose health if you go through the steam, so pay attention to the platforms in the eastern and western corners. Get up on one and activate the steam valve, which will cause half of the steam to disappear. Get over to the other and turn the valve to dissipate the steam entirely. Unfortunately, the entire place is booby-trapped and before long, numerous Dwarven spiders will jump out of the many tubes, and they keep coming until four Dwarven spheres join in. In the middle of the battle, the steam will be turned back on, leaving very little space to fight, so jump back up and turn off the steam if you can. When all four spheres have been dealt with, a sudden noise can be heard from the lava, and a gigantic centurion named The Forgemaster will surface and immediately spray blasts of liquid fire at you. This can be a tough battle, but Katria will prove worthy and can quite easily deal with the Forgemaster herself. Once he is on the ground, you can behold the Aetherium Forge in all its glory, finally rediscovered after 4000 years. An excited Katria will rush up to you and yell: "I... I almost can't believe it. We did it! We actually did it! There's only one thing left to do. We have to prove this actually works. That this is the real Aetherium Forge."
The Aetherium Forge[edit]
It is obvious that she wants to forge something, but the crafting materials are nowhere to be seen, especially not the ultra-rare Aetherium. Katria will respond: "There isn't any Aetherium here, is there? Damn it! Wait! ...Yes, yes there is. The shards we collected... they're pure Aetherium, remember? It's not much, but it'll do. With them, and the materials in this room, we should have everything we need." A useful marker will point you to a chest in an alcove, which is filled with Dwarven metal ingots, ebony ingots, silver and gold ingots, refined malachite and a string of flawless rubies and sapphires. With these items in hand, Katria will stand aside as you approach the mighty Aetherium Forge, where you can craft three different, and very powerful, objects, although only one can be made, as it will consume the Aetherium Crest in the process. Pick carefully:
- The Aetherial Crown is a circlet that allows you to use two standing stone abilities simultaneously.
- The Aetherial Shield is a heavy shield that makes enemies become ethereal (unable to attack or be attacked) for 15 seconds when shield-bashed.
- The Aetherial Staff is a staff that summons a Dwarven spider or Dwarven sphere for 60 seconds.
Once you have used the Forge, Katria will bid you farewell: "And with that... it's done. No one could possibly deny what we've found now." She will then start to fade, saying: "For me? I've done what I set out to do. But you... take that out into the world. And if anyone asks, tell them what we discovered. Together. And now... I think I can rest. Farewell, my friend, wherever your travels take you." Before she disappears completely, she will bow before you, respectfully.
Don't forget to check the alcove on the other (east) side of the room for loot before you leave. If you have enough fire resistance, you can swim to the corners of the lava lake left and right to find gates to open. They will have loot behind them and corridors leading you back to the main room.
The Aetherium Wars, Pt. 2[edit]
Meanwhile, the author of the book, Taron Dreth, will be wandering the wilderness of Skyrim with his band of personal mercenary guards and claiming to be the world's foremost expert in Dwemer metallurgy, based on the research that he stole from Katria. If you run into him while wearing or carrying the unique Aetherium item that you made, Taron will immediately realize that his fraud has been called and will aggressively run up to you, saying: "Your crown/staff/shield... gods, it's made of Aetherium! Pure Aetherium! Where did you find it? Tell me!" He will then demand the artifact so that he can keep his secret safe. Regardless of your answer, you will get revenge on behalf of Katria, as Taron will see no other option but to claim the artifact from you with the words: "Then I'll take it from your corpse!" He and the three mercenaries will then attack you. He is a very powerful elemental mage and can be quite challenging, but in the end, the only thing left to tell the tale of the four Dwemer city-states and the rare, luminescent crystal will be the tome The Aetherium Wars.
Achievements[edit]
One achievement is unlocked when you complete this quest:
 Lost to the AgesDG (30 points/Silver)
Notes[edit]
- At the top tier of the ramps leading into the forge, just before the staircase leading to the Tree growing between two pillars, if you turn to your left and walk along the cliff edge toward a small tree growing in the darkness toward the southern end of the cavern you will find an enchanted Dwarven Battleaxe laying on the ground.
- This quest can be extremely profitable, as you'll be able to find a very large number of Dwemer crafting equipment, sell them to merchants and blacksmiths, have them smelted into Dwarven Metal Ingot, and use the ingots to forge Dwarven weapons and armor.
- The shards will spawn once Dawnguard is installed, even before the quest is active. Should you come across one of them, it will be labeled "Glowing Crystal Shard", and taking it will trigger a miscellaneous quest to "Identify the Crystal Shard" as well as conveniently spawning a dead adventurer with a copy of The Aetherium Wars nearby. Reading the book will prompt you to visit the ruins of Arkngthamz as usual and rename the Aetherium Shard as such.
- Even if you decide to leave Katria behind at the entrance of Arkngthamz, she will reappear later on in front of the Kinetic Resonator puzzle.
- Although Katria appears to be a ghost, she is still capable of casting Detect Life and Heal Other.
- If you take Katria's clothes (specifically, the cuirass) when you examine her corpse for her journal, she will comment about her lost dignity. However, she won't comment if you feed on her corpse.
- If you have already found one or more of the other shards, then there is an extra dialogue option to inform Katria of this before she heads off to find the other shards. The quest proceeds as normal otherwise.
- The map markers for the various shard locations will only appear once you approach the relevant location. It's possible to have markers appear without having a location icon if you've traveled very close to the location without actually discovering it.
- Katria's gear can be changed at the start of the Lost to the Ages quest by canceling out of her initial conversation then using Ice/Paralyze/Force as she walks away to perform a reverse pickpocket. Her bow cannot be upgraded, however.
- In the Aetherium Forge, there is a hidden Dwemer chest, on a rock "island" in the lava pool, behind a rock pillar. It can be accessed by swimming in the lava with the "Become Ethereal" shout and/or sufficiently strong resist fire potions or apparel. It only contains ordinary leveled items.
- If you manage to get to the above-mentioned chest, looking back at the wall behind the Aetherium Forge (i.e. looking north) will reveal typical Dwarven double gates at each outer end of the wall, just above lava level. They can be reached from the "slipways" each side of the Forge using the same techniques as reaching the above-mentioned chest ("Become Ethereal", potions, apparel etc), and are slightly tricky to manage because the gates open outward into the lava and so knock you back into it when you open them. They can be opened however while you are still in the lava, thus allowing you to exit quickly before you fry. They lead to passages containing one leveled Dwemer chest and various bits of Dwemer metal. The passages climb steeply to end at double gates at high level overlooking the main Forge hall, so take care jumping down.
- This is the only quest with the Dawnguard DLC to award you an Achievement/Trophy that doesn't involve the Dawnguard faction or the Volkihar vampires.
Bugs[edit]
- This quest may not start if, after installing Dawnguard, you have visited Mzulft or Deep Folk Crossing prior to reading The Aetherium Wars and the corpses at these locations have been fully removed from the game.
-
The Unofficial Dawnguard Patch, version 2.0.1, fixes this bug.
-
- After forging either the crown, shield, or staff at the forge, the quest may not update and you will remain trapped in the room with the forge as the stairs won't come back up.
- Activating the Forge may place the Aetherium Crest in it, but without opening the Forge menu.
- The lever to operate the lift to enter the Forge may not appear, making it impossible to complete the quest.
- When speaking to Katria after discovering the entrance to the Aetherium Forge, she may disappear, and you will not be able to open the first door within the Forge.
- Katria's journal may be nowhere to be found. However, it is not required to complete the quest.
- Reading The Aetherium Wars may not add the miscellaneous objective "Investigate Arkngthamz" to your quest log. Upon investigating Arkngthamz, "Lost to the Ages" may not be added to quest log, either, meaning that you will be unable to complete the quest.
- A way to fix either bug above is to reload a save in which you have not started the Dawnguard questline, then drop The Aetherium Wars and any crystal shards if you have obtained any, and pick the book back up and read it. The quest should start, and then you can pick up the shards.
- You may not be able to place the shards in the Dwemer mechanism at Bthalft and will be met with the message "Nothing you have will fit into the mechanism." The game doesn't appear to register you owning said Aetherium Shards.
- The best approach if you encounter this issue is, as usual, to reload an earlier save. Attempting to fix this by disabling ANY mod WILL result in errors being introduced into your game—even should you reinstall the mod (the vast majority of mods should NEVER be uninstalled mid-playthrough, due to how the game bakes data into the save).
- Another solution is using
setstageandsetobjectivecompletedconsole commands to progress through stages 170, 176, 181, andsetstage DLC1LD_Bthalft 190, give yourself the crest (0200575B) then usecoc DLC1Bthalft01to teleport to the forge cell and use the elevator lever to go back up (stage 176 and 181 cannot be completed withsetobjectivecompletedcommand and will be completed automatically when you get back up with the elevator lever). Katria will react properly to the quest stages. Thencoc DLC1Bthalft01to get down to the forge cell again (as the actual elevator tower is still broken). If you did it correctly, Katria will be with you when you get back down to the forge elevator and you can continue normally, except you will always have to usecoc DLC1Bthalft01to get down to the forge later without a mod.
- The doors may not open even after hitting all five Resonators in the correct order.
- This can be fixed by hitting the wrong Resonator first, defeating the enemies, then hitting the correct order. Alternatively, reloading a previous save may work:
- Try restarting the game, reloading your save file, and dropping the Zephyr bow back on the log where it was found. Then proceed to the Resonator and continue as normal.
- A save prior to entering Arkngthamz may resolve this issue, as it may be caused from loading a save file made in Arkngthamz during the quest. One could attempt to complete this portion of "Lost to the Ages" by saving before entering Arkngthamz and making one good run of it, from start to end, without relying on a back-up save mid-dungeon.
- This can be fixed by hitting the wrong Resonator first, defeating the enemies, then hitting the correct order. Alternatively, reloading a previous save may work:
- If you leave Raldbthar before getting the shard, Katria may become unresponsive and the shard will not update the quest when picked up. ?
- The shard in Raldbthar may be called 'Glowing Crystal Shard' instead of an Aetherium shard, and picking it up does not update the quest, making the quest impossible to complete with a 'missing' shard. Console commands to advance the
DLCLD_Miscquest do not work either.- Pick up the shard in Dwarven Storeroom last to avoid this problem.
- Katria can be made into a permanent follower by speaking to her at the Tonal Lock gate then immediately leaving the ruins via the waterway tunnel (left of the Tonal Lock gate). This makes the Tonal Lock gate glitch so that it will not open, though this can be bypassed by exploiting the plate bug to Windsprint through it if you wish to continue the quest at a later point. ?
- The Centurion at the Tonal Lock is unkillable unless released by choosing an incorrect lock order. If you free it otherwise, such as by using the console command
disableon the gate holding it in, it can be exploited to raise combat skills by fighting it for as long as you want. ? - If you turn Katria's initial offer down and choose to explore Arkngthamz alone, she will sometimes respawn on the rocks opposite the puzzle door and be unresponsive. She will then fail to initiate dialogue with you after picking up the shard. This is easily fixed by leaving the ruin and making your way through to the shard room beyond the puzzle door again, at which point she should appear, initiate dialogue as normal and start the sidequest.
- If you have a stolen Flawless Sapphire in your inventory from a radiant Thieves Guild quest then it might be impossible to forge the Aetherial Crown (not enough Flawless Sapphires) even with two or more normal Flawless Sapphires in your inventory. In the console
player.showinventorydisplays the stolen and normal gems separately but with the same base ID. The solution is to drop all normal ones, force drop the stolen one with the consoleplayer.drop 00068523 1, and then pick up two normal gems (only) to craft with. ?
Quest Stages[edit]
| Lost to the Ages (DLC1LD) | ||
|---|---|---|
| Stage | Finishes Quest | Journal Entry |
| 100 | In Arkngthamz, I met Katria, the ghost of an adventurer who perished there. She offered to join me in my fight to the summit, and I accepted her help. (Objective is assigned): Reach the summit of Arkngthamz | |
| 110 | (Objective is assigned): Solve the Tonal Lock | |
| 111 | In Arkngthamz, I met Katria, the ghost of an adventurer who perished there. She warned me that the Treasury of Arkngthamz was sealed by a dangerous Tonal Lock and protected by deadly traps. | |
| 112 | In Arkngthamz, I met Katria, the ghost of an adventurer who perished there. We made our way through the ruins and reached the summit together. There, she warned me that the Treasury of Arkngthamz was sealed by a dangerous Tonal Lock and protected by deadly traps. | |
| 120 | In Arkngthamz, I met Katria, the ghost of an adventurer who perished there. With her help, I solved the Tonal Lock that protected its ruined treasury. (Objective is assigned): Claim the treasure of Arkngthamz | |
| 125 | In Arkngthamz, I met Katria, the ghost of an adventurer who perished there. With her help, I solved the Tonal Lock that protected its ruined treasury and found a strange glowing crystal shard within. (Objective is assigned): Speak with Katria | |
| 126 | In Arkngthamz, I met Katria, the ghost of an adventurer who perished there. With her help, I solved the Tonal Lock that protected its ruined treasury and claimed the Aetherium Shard within. | |
| 130 | In Arkngthamz, I met Katria, a ghost searching for the mythical Aetherium Forge. Together, we found one of the four Aetherium Shards that make up the key to the Forge. She left to search for the other shards and the Forge itself, and urged me to do the same. (Objective is assigned): Search for the Aetherium Shards (<Global=DLC1LD_ShardsFound>/<Global=DLC1LD_ShardsTotal>) | |
| 131 | (Objective is assigned): Locate the Aetherium Forge | |
| 135 | (Objective is assigned): (Optional) Retrieve Katria's Journal | |
| 150 | In Arkngthamz, I met Katria, a ghost searching for the mythical Aetherium Forge. With her help, I found the four Aetherium Shards that make up the key to the Forge, and now seek the entrance to the Forge itself. (Objective is assigned): Locate the Aetherium Forge | |
| 160 | In Arkngthamz, I met Katria, a ghost searching for the mythical Aetherium Forge. With her help, I found the four Aetherium Shards that make up the key to the Forge, and met her outside its long-sealed entrance. (Objective is assigned): Speak with Katria | |
| 170 | (Objective is assigned): Place the Aetherium Shards | |
| 176 | (Objective is assigned): Retrieve the Aetherium Crest | |
| 181 | (Objective is assigned): Stand Clear | |
| 190 | In Arkngthamz, I met Katria, a ghost searching for the mythical Aetherium Forge. With her help, I found the four Aetherium Shards that made up the key to the Forge, and combined them to reveal the entrance to a long-sealed ruin. (Objective is assigned): Find the Aetherium Forge | |
| 195 | (Objective is assigned): Shut off the Steam | |
| 200 | In Arkngthamz, I met Katria, a ghost searching for the mythical Aetherium Forge. With her help, I found the four Aetherium Shards that made up the key to the Forge, then confronted its ancient guardians. (Objective is assigned): Defeat the Guardians of the Forge | |
| 205 | (Objective is assigned): (Optional) Shut off the Steam | |
| 210 | In Arkngthamz, I met Katria, a ghost searching for the mythical Aetherium Forge. With her help, I found the four Aetherium Shards that made up the key to the Forge, then defeated its ancient guardians. (Objective is assigned): Speak with Katria | |
| 220 | (Objective is assigned): (Optional) Search for Crafting Materials (Objective is assigned): Use the Aetherium Forge | |
| 225 | In Arkngthamz, I met Katria, a ghost searching for the mythical Aetherium Forge. With her help, I found the four Aetherium Shards that made up the key to the Forge, defeated its ancient guardians, and forged a powerful artifact. | |
| Lost to the Ages (DLC1LD_Misc) | ||
| 11 | (Objective is assigned): Investigate the ruins of Arkngthamz | |
| 20 | (Objective is assigned): Identify the Crystal Shard | |
| 30 | (Objective is assigned): Identify the Crystal Shard | |
| 40 | (Objective is assigned): Identify the Crystal Shard | |
| 50 | (Objective is assigned): Identify the Crystal Shard | |
- The following empty quest stages were omitted from the table:
- DLC1LD: 0, 1, 2, 3, 4, 5, 6, 7, 10, 20, 30, 40, 50, 70, 71, 72, 73, 74, 75, 140, 141, 142, 143, 144, 145, 146, 147, 148, 175, 179, 180, 182, 185, 186, 187, 196, 206, 221, 255.
- DLC1LD_Misc: 10, 12, 255.
- Any text displayed in angle brackets (e.g.,
<Alias=LocationHold>) is dynamically set by the Radiant Quest system, and will be filled in with the appropriate word(s) when seen in game. - Not all Journal Entries may appear in your journal; which entries appear and which entries do not depends on the manner in which the quest is done.
- Stages are not always in order of progress. This is usually the case with quests that have multiple possible outcomes or quests where certain tasks may be done in any order. Some stages may therefore repeat objectives seen in other stages.
- If an entry is marked as "Finishes Quest" it means the quest disappears from the Active Quest list, but you may still receive new entries for that quest.
- On the PC, it is possible to use the console to advance through the quest by entering
setstage DLC1LD stage, wherestageis the number of the stage you wish to complete. It is not possible to un-complete (i.e. go back) quest stages, but it is possible to clear all stages of the quest usingresetquest DLC1LD.

