Daggerfall talk:Medora's Freedom
Contents
Overly Complicated Walkthrough[edit]
I came back to Daggerfall this spring after seeing clever youtube playthroughs and decided to give it another go, getting to really know the game's mechanics and the dungeon blocks, I learned a lot about the layouts of different dungeon types. A lot of people, myself included, come to this page after discovering or rediscovering Daggerfall and rely on the main quest walk-throughs to get them through the mazes. When looking at the walkthrough on this page, I find both Route 1 and Route 2 are both far too convoluted and complicated. Both routes require far too many turns, activators, and teleporters and suggest the use of magic or potions to navigate, along with and all kinds of other complications. This is the kind of thing that frustrates and scares off newer players. There ought to be an easier way, and in fact there is. No activators or levers until you get to the lever puzzle in the last room, and one more just before you exit. No guessing or poking around or having to use powers or potions you don't have, and except for the first tower and the lever puzzle room, it's all on a single floor, no getting lost going up or down.
Considering that you have to go through Direnni Tower four or five times in the course of a game, the walk-through page ought to feature the easiest and most universally accessible route for any character type. So I'm writing one. I don't want to outright delete somebody else's work without a consensus, but I feel like this page isn't checked very often and there's a resurgence of interest in the game recently.
Here is my walkthrough with the fewest turns and most direct route:
You will have to go through Direnni Tower four or five times in the course of the game. You will be facing a lot of undead enemies in this dungeon, including many vampires and enemies who can paralyze you, so be prepared. You can fight or you can run past them when you can. Because they're undead, invisibility won't work on them.
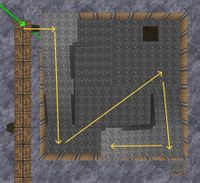
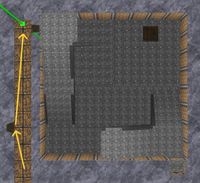
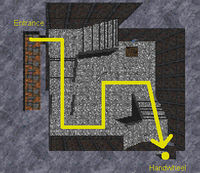
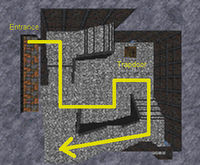
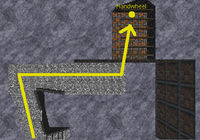
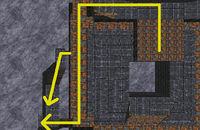
When you enter Direnni Tower, immediately turn left and go through the door. Descend the stairs to the right, turn left and cross the room. Go up the stairs on the opposite side, starting near the trap door in the floor. On the first landing, you will see a wheel in an alcove. This wheel will move a wall near the exit, but there's another wheel that will activate the same wall elsewhere, so you don't need to mess with it now.
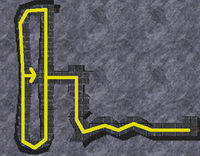
Instead, ignore the wheel and turn right. Follow the stairs up several flights of stairs. When you reach the second-to-last landing you'll see the third door on the stairs. Enter the door, then turn left and you'll see a hidden door along the wall. Open the hidden door, then follow the passage beyond until you go down a ramp where you will find a hole in the floor. The hole is a one story drop.
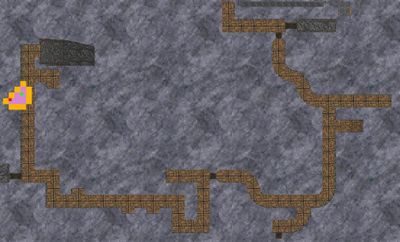
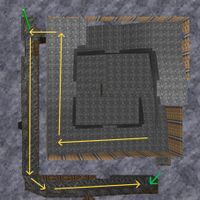
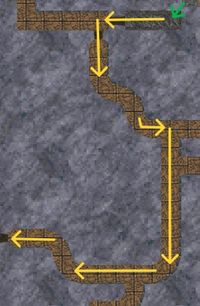
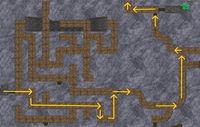
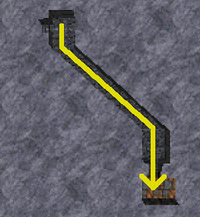
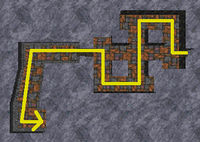
Once you enter the hole (by jumping, climbing, or levitating), turn around and you'll see another hidden stone door. Open the hidden door, then immediately turn left when you exit to find another door. Open that door and go through. Follow this curving hallway without turning down any passages until you find a lever on the wall to your left. At the lever, turn right and follow that curving hallway until you come to another door.
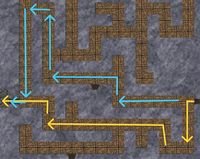
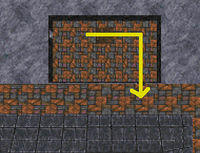
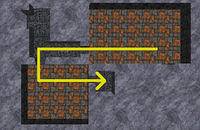
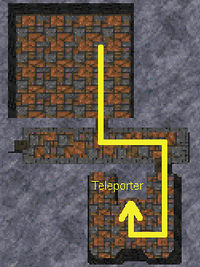
When you enter the door, turn left and follow that hallway to the end where you will find another door. Alternately you can go straight and follow the path outlined in blue, but it's more complicated with more turns and a higher chance for enemy encounters or taking a wrong turn.
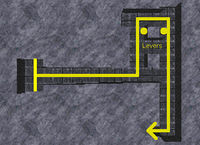
Open that door and enter a cavernous room with six stone pillars and three wraiths. There are three hallways leading to doors. The one in the middle has ramps that go down either side before you see the door. Both ramps end in the same location so follow it down either way. When you get to the bottom of either side of the ramp, turn and go down another ramp into to the lever room.
At the bottom of the ramp, you will see a pillar on your left with levers on each side. Pull the two levers on the sides of the pillar facing the bull tapestries, but leave the other two levers alone. Go to the door where you hear the Vampire Ancient, open it and follow the maze through to another door.
From there, follow the hallway back up stairs until you are facing a lich. Just past the lich on your right is the door to Medora's chamber.
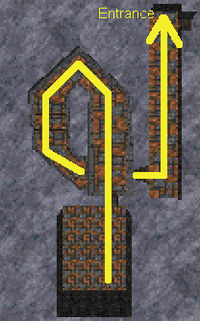
When leaving, follow the same route back to where you dropped down the hole in the secret passage. When you come to the formerly hidden open stone door leading to the hole on your right, turn left instead. Go straight ahead and around the next corner to your right and you'll see a wheel on the wall to your right. If you didn't mess with the wheel on the first landing back at the beginning, then you should see an alcove to a door ahead of you on the left wall and a stone wall ahead of you just past the alcove. (If you see the wall ahead of you but no alcove or door, then you turned the wheel on the first landing. Spin the wheel here once to watch the wall move back into its original position, which will reveal the doorway.)
Once you see the door, turn the wheel and immediately run for the doorway as the wall starts moving. You should be able to get there before the wall blocks the alcove. Enter the alcove, but don't open or go through the door. Once the wall moves past you, go back into the hall and you will find yourself at the exit.
----
Let me know if I've overstepped. - BelowTheRoot (talk) 19:01, 1 May 2025 (UTC)
Old two-route walkthrough[edit]
In order to preserve the old:
After entering the Direnni Tower, head through the door to the left and enter the tall room. You will be attacked by two skeletal warriors immediately. There are two routes you can take to reach Medora, though they both converge near the end.
Route 1[edit]
Go down the stairs, watch out for two vampires at the bottom, go up the other stairway, and turn the handwheel on the landing. Return to the entrance and the large stone which previously blocked the passage will have moved.
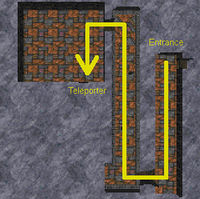
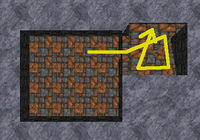
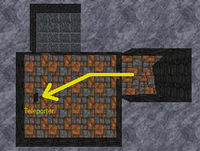
Follow the passage and go through the door. Head north and you will encounter an enemy. Dispose of him and enter the room. In the room, you will find a red brick teleporter. Walk through it to be transported to a room flooded with water and containing a water monster.
Go through the door and up the spiral staircase.
Go through the door to a room with another red brick teleporter, but this time you must click on it with the cursor to activate it. You will be teleported to a room with a closed trap door and an enemy.
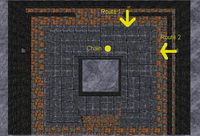
Take care of him and leave the room through the south door. You will find yourself in a huge chamber with a hollow truncated pyramid flooded with water.
Route 2[edit]
Walk down the staircase until you reach the bottom, watching out for the two vampires, and then climb to the top of the other staircase. Watch out for a ghost on your way up.
Open the locked door at the top of the stairs, guarded by two wraiths, to find a room with a handwheel above a fireplace. Turn it and it will open the trap door located at the bottom of the tall room.
Walk down to the bottom of the tall room, jump down the now-open trap door, and destroy the lich and the imp. Go through the west door and follow the hallway a few steps. There is a secret door located at the south wall of this hallway; open it and enter the room. Leave the room through the east door and enter the hallway.
Follow the hallway south until you come to an intersection.
Go east a few steps and head south past a staircase leading up, and you will come to another intersection. Head west through the hallway and through the door at the end. You will find yourself in a huge chamber with a hollow truncated pyramid flooded with water.
The Final Path[edit]
Once you are in the room with the hollow truncated pyramid, find the chain hanging at the edge of the pyramid's opening. Click it and it will cast a levitation spell on you. There is also a staircase behind the west door of the huge room which will lead to the level above you.
From this platform, head north. Take care of the enemy and go up the west staircase. Follow the hallway south until you reach a second intersection, watching out for an enemy around the corner, and go through the door to the west.
Follow the hallway west until you come to an intersection, but watch out for some wraiths along the way. Head north a few steps past the first intersection and turn west at the second intersection. There are two downward-sloping passages which will both take you to your destination; you will encounter a vampire along each passage.
Once you arrive at the bottom, go east. In this passage, you will find numerous levers guarded by a ghost. Pull the two levers that are across from the Direnni Banner. Once you have pulled these two levers, head south and go through the door at the end of the hallway.
Follow the open passage and go through the door at the end of the unblocked passage, then continue up the stairs and take care of the two wraiths.
Follow the stairway further upwards and you will finally reach Medora Direnni's chamber. There is a lich guarding the entrance door, so kill it and enter the chamber.
Returning to the Entrance by Foot[edit]
If you didn't set a Recall anchor near the entrance, you must backtrack your way to the exit by foot. Remember, you must use the same route you used to get here; you can't switch routes on your way back. The trap door in the large room will be closed if you took Route 1, and the large stone near the entrance will block your way if you took Route 2. You can bypass the stone only if you are fast enough (Speed 70 and Running 40 or so). Using the wheel next to it, push it far from you (towards the exit). Then use the wheel again and run to the door near the stone. Wait until the stone passes you and go to the exit.
If you took Route 2, just return the same way you came; however you will need a potion or spell with a levitation effect to float up through the trap door. You can't climb up since the opening is in the middle of the room away from any walls.
If you took Route 1, you will have a somewhat longer way back. Start by returning to the room with the hollow pyramid and enter the north room, the one with the closed trap door.
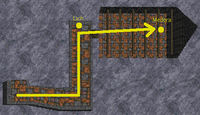
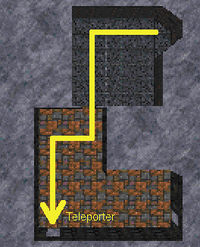
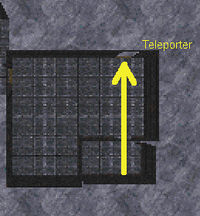
In this room, go west and down the stairs. This door may be locked, in which case there are longer, undocumented routes. You will come to a room flooded to your knees with water. There will be an undead foe in the closet there. There is a torch near the door; pull it and a bookcase will slide to the side, granting you access to a teleporter. Go through it.
You will be teleported to a room containing an enemy. After you've taken care of it, leave the room and go through the teleporter in the next room.
You will be teleported into a closet of yet another room. Go through the teleporter in this room, but leave the west door locked because an enemy will be waiting there.
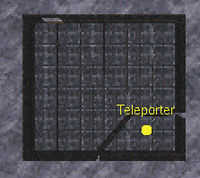
You will be teleported to an enclosed area of another room. There is nothing but a teleporter there; go through it. The lever in this enclosed area opens the trap door in the room north of the hollow pyramid, but there is nothing beyond the trap door besides a quest location where you can find some random loot. It isn't worth it to go all the way back; besides, the whole area is underwater.
After you have been teleported, leave the room through the south door and enter the room across the hallway. There will be an enemy in this room. Take care of her and go through the teleporter.
This time, you will be teleported to a room containing a throne on a pedestal and an enemy. After you have taken care of him, leave that room and enter the room across the hallway. Walk through the teleporter in this room.
That was the last teleporter you had to take. You'll have been teleported to a room containing an enemy. After he is disposed of, go through the door and down the stairs. Then go through the door at the bottom of the staircase and walk a few steps north to reach the entrance.
-BelowTheRoot (talk) 19:13, 1 May 2025 (UTC)
